使用Expo React Native构建用户管理应用
本教程展示如何构建一个基本的用户管理应用程序。该应用程序对用户进行身份验证和识别,将其个人资料信息存储在数据库中,并允许用户登录、更新个人资料详细信息以及上传个人资料照片。该应用程序使用:
- Supabase数据库 - 一个Postgres数据库,用于存储用户数据,并通过行级安全性来保护数据,确保用户只能访问自己的信息。
- Supabase身份验证 - 允许用户注册和登录。
- Supabase存储 - 用户可以上传个人资料照片。
如果在学习本指南时遇到问题,请参考GitHub上的完整示例。
项目设置
在开始构建之前,我们需要设置数据库和 API。这就像在 Supabase 中创建一个新项目,然后在数据库中创建一个 “模式” 一样简单。
创建项目
- 在 Supabase 仪表板中创建一个新项目。
- 输入项目详细信息。
- 等待新数据库启动。
设置数据库模式
现在我们要设置数据库模式。我们可以在 SQL 编辑器中使用 “用户管理入门” 快速启动模板,或者您也可以直接复制/粘贴下面的 SQL 并自行运行。
获取 API 密钥
既然您已经创建了一些数据库表,就可以使用自动生成的 API 插入数据了。
我们只需要从 API 设置中获取项目 URL 和 anon 密钥。
- 前往仪表板中的 API 设置 页面。
- 在该页面找到您的项目
URL、anon和service_role密钥。
构建应用
让我们从零开始构建这个React Native应用。
初始化 React Native 应用
我们可以使用 expo 来初始化一个名为 expo-user-management 的应用:
123npx create-expo-app -t expo-template-blank-typescript expo-user-managementcd expo-user-management然后安装额外的依赖项:supabase-js
1npx expo install @supabase/supabase-js @react-native-async-storage/async-storage @rneui/themed现在创建一个辅助文件来初始化 Supabase 客户端。我们需要之前复制的 API URL 和 anon 密钥。这些变量在您的 Expo 应用中暴露是安全的,因为 Supabase 已在您的数据库上启用了行级安全。
1234567891011121314import AsyncStorage from '@react-native-async-storage/async-storage'import { createClient } from '@supabase/supabase-js'const supabaseUrl = YOUR_REACT_NATIVE_SUPABASE_URLconst supabaseAnonKey = YOUR_REACT_NATIVE_SUPABASE_ANON_KEYexport const supabase = createClient(supabaseUrl, supabaseAnonKey, { auth: { storage: AsyncStorage, autoRefreshToken: true, persistSession: true, detectSessionInUrl: false, },})设置登录组件
让我们设置一个React Native组件来管理登录和注册功能。 用户将能够通过邮箱和密码进行登录。
12345678910111213141516171819202122232425262728293031323334353637383940414243444546474849505152535455565758596061626364656667686970717273747576777879808182838485868788899091929394import React, { useState } from 'react'import { Alert, StyleSheet, View, AppState } from 'react-native'import { supabase } from '../lib/supabase'import { Button, Input } from '@rneui/themed'// 告诉Supabase Auth在前台状态下自动持续刷新会话// 添加此功能后,当用户会话终止时,您将继续收到带有`TOKEN_REFRESHED`或`SIGNED_OUT`事件的// `onAuthStateChange`通知。此功能只需注册一次。AppState.addEventListener('change', (state) => { if (state === 'active') { supabase.auth.startAutoRefresh() } else { supabase.auth.stopAutoRefresh() }})export default function Auth() { const [email, setEmail] = useState('') const [password, setPassword] = useState('') const [loading, setLoading] = useState(false) async function signInWithEmail() { setLoading(true) const { error } = await supabase.auth.signInWithPassword({ email: email, password: password, }) if (error) Alert.alert(error.message) setLoading(false) } async function signUpWithEmail() { setLoading(true) const { data: { session }, error, } = await supabase.auth.signUp({ email: email, password: password, }) if (error) Alert.alert(error.message) if (!session) Alert.alert('请检查您的收件箱以完成邮箱验证!') setLoading(false) } return ( <View style={styles.container}> <View style={[styles.verticallySpaced, styles.mt20]}> <Input label="邮箱" leftIcon={{ type: 'font-awesome', name: 'envelope' }} onChangeText={(text) => setEmail(text)} value={email} placeholder="email@address.com" autoCapitalize={'none'} /> </View> <View style={styles.verticallySpaced}> <Input label="密码" leftIcon={{ type: 'font-awesome', name: 'lock' }} onChangeText={(text) => setPassword(text)} value={password} secureTextEntry={true} placeholder="Password" autoCapitalize={'none'} /> </View> <View style={[styles.verticallySpaced, styles.mt20]}> <Button title="登录" disabled={loading} onPress={() => signInWithEmail()} /> </View> <View style={styles.verticallySpaced}> <Button title="注册" disabled={loading} onPress={() => signUpWithEmail()} /> </View> </View> )}const styles = StyleSheet.create({ container: { marginTop: 40, padding: 12, }, verticallySpaced: { paddingTop: 4, paddingBottom: 4, alignSelf: 'stretch', }, mt20: { marginTop: 20, },})默认情况下,Supabase Auth要求用户在创建会话前完成邮箱验证。要支持邮箱验证功能,您需要实现深度链接处理!
在测试期间,您可以在项目的邮箱认证提供者设置中禁用邮箱确认功能。
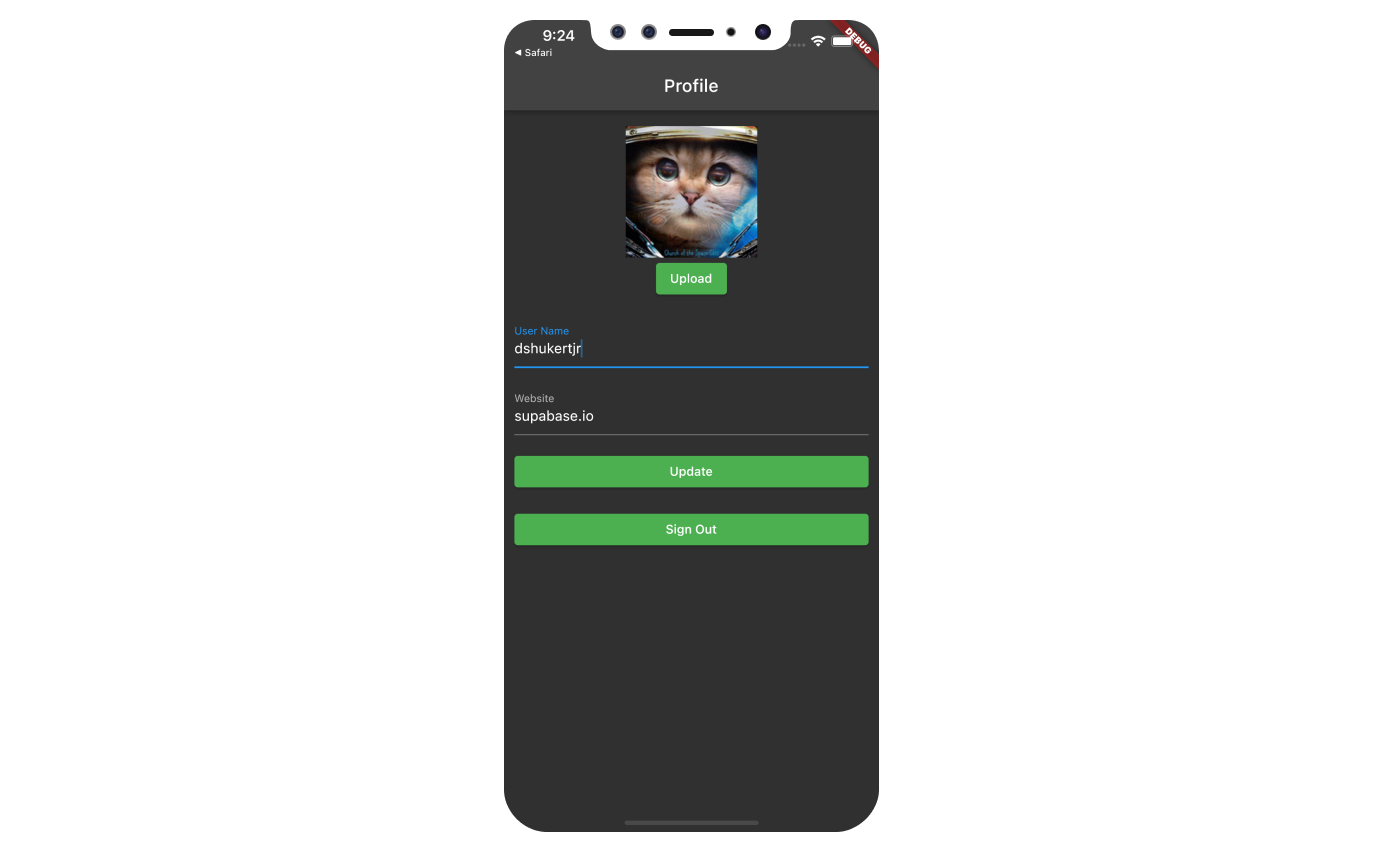
账户页面
用户登录后,我们可以允许他们编辑个人资料信息和管理账户。
让我们为此创建一个名为 Account.tsx 的新组件。
123456789101112131415161718192021222324252627282930313233343536373839404142434445464748495051525354555657585960616263646566676869707172737475767778798081828384858687888990919293949596979899100101102103104105106107108109110111112113114115116117118119120import { useState, useEffect } from 'react'import { supabase } from '../lib/supabase'import { StyleSheet, View, Alert } from 'react-native'import { Button, Input } from '@rneui/themed'import { Session } from '@supabase/supabase-js'export default function Account({ session }: { session: Session }) { const [loading, setLoading] = useState(true) const [username, setUsername] = useState('') const [website, setWebsite] = useState('') const [avatarUrl, setAvatarUrl] = useState('') useEffect(() => { if (session) getProfile() }, [session]) async function getProfile() { try { setLoading(true) if (!session?.user) throw new Error('No user on the session!') const { data, error, status } = await supabase .from('profiles') .select(`username, website, avatar_url`) .eq('id', session?.user.id) .single() if (error && status !== 406) { throw error } if (data) { setUsername(data.username) setWebsite(data.website) setAvatarUrl(data.avatar_url) } } catch (error) { if (error instanceof Error) { Alert.alert(error.message) } } finally { setLoading(false) } } async function updateProfile({ username, website, avatar_url, }: { username: string website: string avatar_url: string }) { try { setLoading(true) if (!session?.user) throw new Error('No user on the session!') const updates = { id: session?.user.id, username, website, avatar_url, updated_at: new Date(), } const { error } = await supabase.from('profiles').upsert(updates) if (error) { throw error } } catch (error) { if (error instanceof Error) { Alert.alert(error.message) } } finally { setLoading(false) } } return ( <View style={styles.container}> <View style={[styles.verticallySpaced, styles.mt20]}> <Input label="邮箱" value={session?.user?.email} disabled /> </View> <View style={styles.verticallySpaced}> <Input label="用户名" value={username || ''} onChangeText={(text) => setUsername(text)} /> </View> <View style={styles.verticallySpaced}> <Input label="网站" value={website || ''} onChangeText={(text) => setWebsite(text)} /> </View> <View style={[styles.verticallySpaced, styles.mt20]}> <Button title={loading ? '加载中...' : '更新'} onPress={() => updateProfile({ username, website, avatar_url: avatarUrl })} disabled={loading} /> </View> <View style={styles.verticallySpaced}> <Button title="退出登录" onPress={() => supabase.auth.signOut()} /> </View> </View> )}const styles = StyleSheet.create({ container: { marginTop: 40, padding: 12, }, verticallySpaced: { paddingTop: 4, paddingBottom: 4, alignSelf: 'stretch', }, mt20: { marginTop: 20, },})启动应用!
现在我们已经准备好了所有组件,让我们更新 App.tsx 文件:
1234567891011121314151617181920212223242526import { useState, useEffect } from 'react'import { supabase } from './lib/supabase'import Auth from './components/Auth'import Account from './components/Account'import { View } from 'react-native'import { Session } from '@supabase/supabase-js'export default function App() { const [session, setSession] = useState<Session | null>(null) useEffect(() => { supabase.auth.getSession().then(({ data: { session } }) => { setSession(session) }) supabase.auth.onAuthStateChange((_event, session) => { setSession(session) }) }, []) return ( <View> {session && session.user ? <Account key={session.user.id} session={session} /> : <Auth />} </View> )}完成后,在终端窗口中运行以下命令:
1npm start然后根据您要测试的环境按下相应的键,您应该能看到完整的应用程序。
额外功能:个人资料照片
每个 Supabase 项目都配置了存储功能,用于管理照片和视频等大型文件。
安装额外依赖
您需要一个适用于目标环境的图片选择器,本示例中我们将使用 expo-image-picker。
1npx expo install expo-image-picker创建上传组件
让我们为用户创建一个头像组件,使他们能够上传个人资料照片。 我们可以从创建一个新组件开始:
123456789101112131415161718192021222324252627282930313233343536373839404142434445464748495051525354555657585960616263646566676869707172737475767778798081828384858687888990919293949596979899100101102103104105106107108109110111112113114115116117118119120121122123124125126127128129130import { useState, useEffect } from 'react'import { supabase } from '../lib/supabase'import { StyleSheet, View, Alert, Image, Button } from 'react-native'import * as ImagePicker from 'expo-image-picker'interface Props { size: number url: string | null onUpload: (filePath: string) => void}export default function Avatar({ url, size = 150, onUpload }: Props) { const [uploading, setUploading] = useState(false) const [avatarUrl, setAvatarUrl] = useState<string | null>(null) const avatarSize = { height: size, width: size } useEffect(() => { if (url) downloadImage(url) }, [url]) async function downloadImage(path: string) { try { const { data, error } = await supabase.storage.from('avatars').download(path) if (error) { throw error } const fr = new FileReader() fr.readAsDataURL(data) fr.onload = () => { setAvatarUrl(fr.result as string) } } catch (error) { if (error instanceof Error) { console.log('下载图片错误: ', error.message) } } } async function uploadAvatar() { try { setUploading(true) const result = await ImagePicker.launchImageLibraryAsync({ mediaTypes: ImagePicker.MediaTypeOptions.Images, // 仅限图片 allowsMultipleSelection: false, // 只能选择一张图片 allowsEditing: true, // 允许用户在上传前裁剪/旋转照片 quality: 1, exif: false, // 我们不需要这些数据 }) if (result.canceled || !result.assets || result.assets.length === 0) { console.log('用户取消了图片选择') return } const image = result.assets[0] console.log('获取到图片', image) if (!image.uri) { throw new Error('没有图片uri!') // 实际上这种情况应该不会发生,但以防万一... } const arraybuffer = await fetch(image.uri).then((res) => res.arrayBuffer()) const fileExt = image.uri?.split('.').pop()?.toLowerCase() ?? 'jpeg' const path = `${Date.now()}.${fileExt}` const { data, error: uploadError } = await supabase.storage .from('avatars') .upload(path, arraybuffer, { contentType: image.mimeType ?? 'image/jpeg', }) if (uploadError) { throw uploadError } onUpload(data.path) } catch (error) { if (error instanceof Error) { Alert.alert(error.message) } else { throw error } } finally { setUploading(false) } } return ( <View> {avatarUrl ? ( <Image source={{ uri: avatarUrl }} accessibilityLabel="头像" style={[avatarSize, styles.avatar, styles.image]} /> ) : ( <View style={[avatarSize, styles.avatar, styles.noImage]} /> )} <View> <Button title={uploading ? '上传中...' : '上传'} onPress={uploadAvatar} disabled={uploading} /> </View> </View> )}const styles = StyleSheet.create({ avatar: { borderRadius: 5, overflow: 'hidden', maxWidth: '100%', }, image: { objectFit: 'cover', paddingTop: 0, }, noImage: { backgroundColor: '#333', borderWidth: 1, borderStyle: 'solid', borderColor: 'rgb(200, 200, 200)', borderRadius: 5, },})添加新组件
然后我们可以将这个组件添加到账户页面:
123456789101112131415161718192021// 导入新组件import Avatar from './Avatar'// ...return ( <View> {/* 添加到主体部分 */} <View> <Avatar size={200} url={avatarUrl} onUpload={(url: string) => { setAvatarUrl(url) updateProfile({ username, website, avatar_url: url }) }} /> </View> {/* ... */} </View>)// ...现在你需要运行预构建命令,使应用在你选择的平台上运行:
1npx expo prebuild至此,你已经拥有了一个功能完整的应用程序!